How to Reuse wood off-cuts & old Breadboards
Make a Garden Sign!
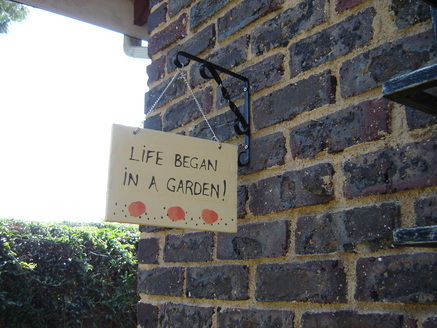
Maybe I'm cheesy, or kitsch, but I have a thing for garden signs. I think they're so pretty, and the more I do outdoors, the more it feels as if 'I live here'. This is my space, and I like it to be pretty.
I needed a bit of husband help with this project, but this is what we did. Hubby was working with thin pine wood planks (I can't recall what for), and I saw the wood off-cuts as an opportunity to make some art.
We cut three off-cuts to the same length, and glued the narrow sides together using wood glue. Use clamps to hold the seams together while it dries. It'll dry in a day or two. Then simply get hubby to drill two holes for you to hang it, and then it's yours!
I used normal water based kiddy craft paint to paint this (and yet it's never needed to be repainted - not in 18 years!). Just make swirls for flowers, dot some greenery on it, and paint on your words. Leave it to dry for two days, then paint the other side. We hung up ours using a garden hook for a hanging plant. Simply put a keyring (keychain) circlet through each hole, and use a piece of chain (bath plug chain works) attached to each circlet.
Voila!
Or - if you ever replace your breadboard (sometimes we have to), don't throw the old one away! Give it a sanding with sandpaper to make it smooth again, and use that as the wooden base for your garden sign.
You don't have to hang it either, you can attach it to a wooden stake, or a metal stake (the kind the estate agents use), and hammer it into the ground - to label plants etc.
Easy peasy and so pretty - and now you have it forever!
Another way to use old breadboards is to burn them with writing and patterns. Use a soldering iron on a freshly sanded breadboard. This burns the wood with your patterns and wording. To seal it, just use Waksol. These plain breadboard / branded signs can also be stained before sealing, for that rustic look.
